A simple asmx page is known as Web Service. For the creation of the web service, we will use the Visual Studio 2017, which is using the .NET Framework 4.8. For creating the Web Service, we will follow the following steps:
Step 1: Firstly, we will create a Web Application for creating the Web Service.
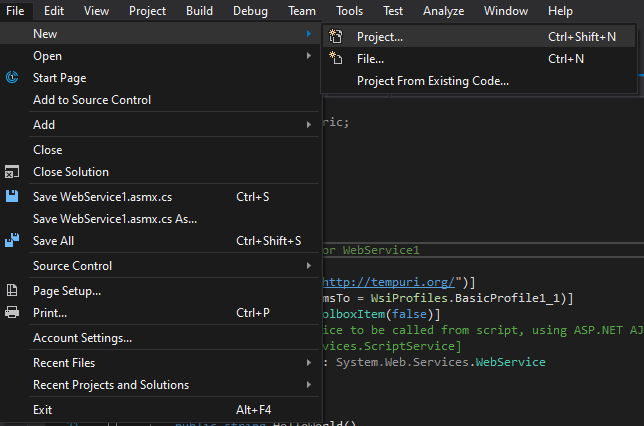
For that, we will click on the File-> Select Project as shown in the below screenshot:
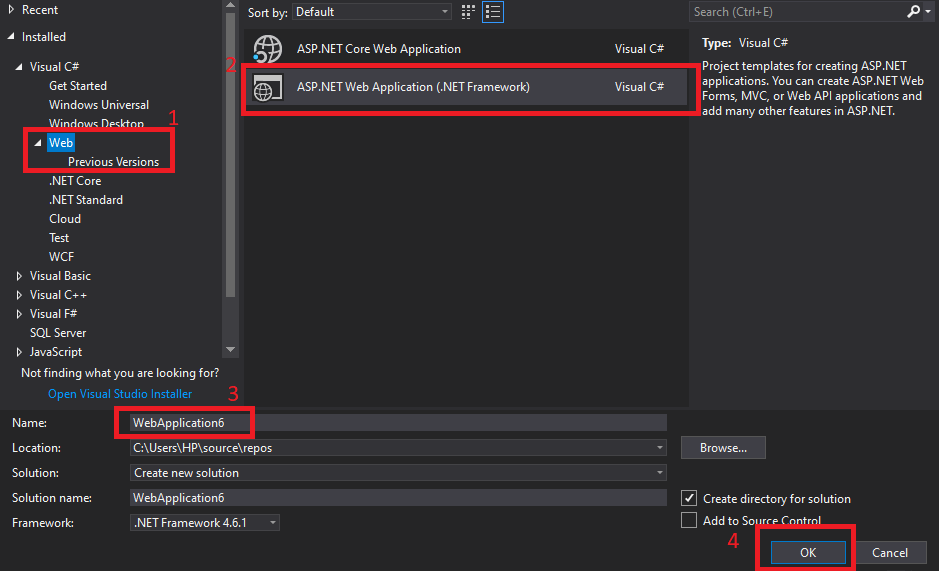
After that the new window will open as shown in the below screenshot:
From here, we will select the Web->Asp.Net Web Application->Name of the Web Application-> Click on OK.
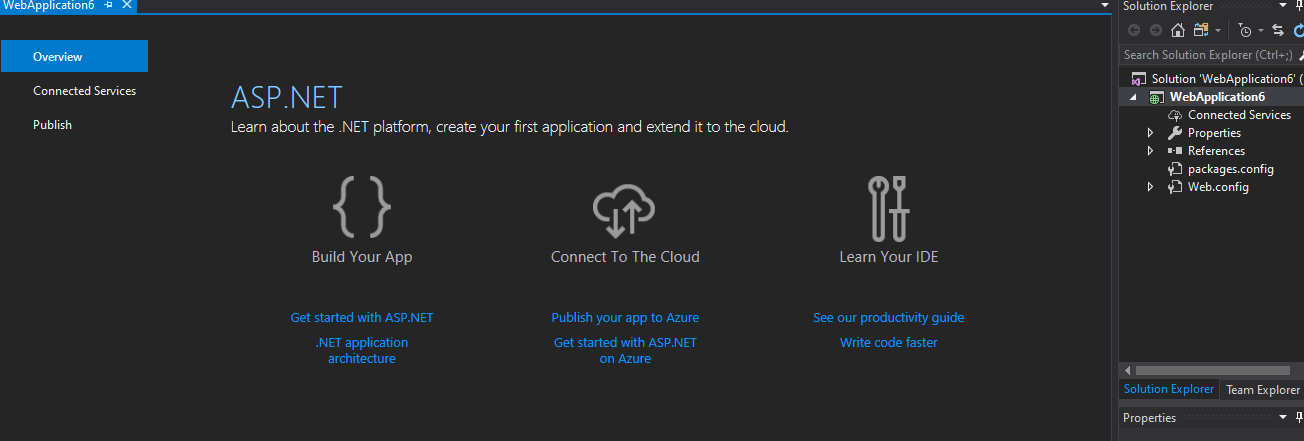
After this a new window will be shown us like as shown below:
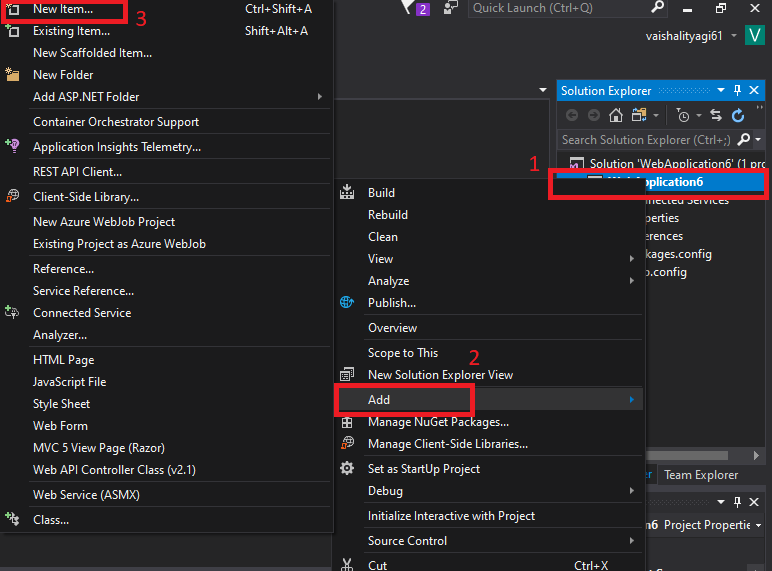
For creating the Web Service, we will do the right click on the project name-> Click on Add-> Add New Item. As shown in the below screenshot:
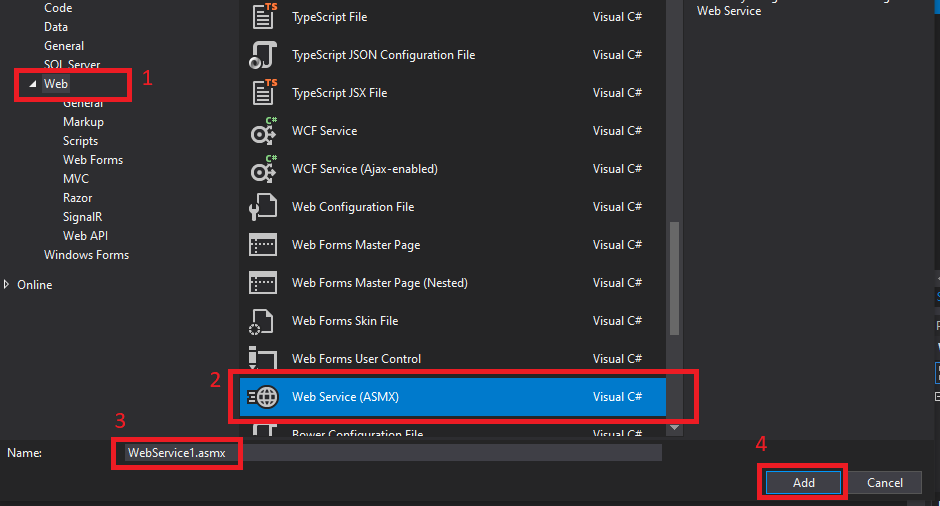
After this, a new window will appear. From where we have to click on the Web-> Select Web Service(.asmx page)-> Give a name to the Web Service as shown in the below screenshot:
After adding the Web Service to the application, a new window will appear which is shown as below: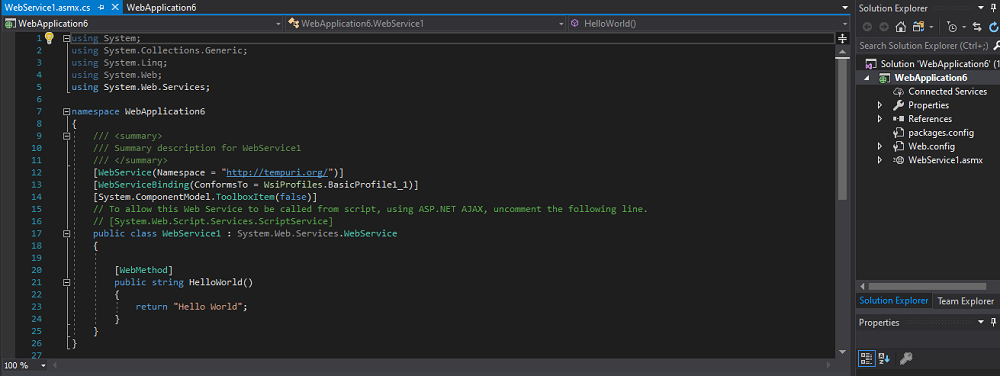
Visual Studio creates the not changeable web service-Analyzation of template used in the Visual Studio.
Explanation of Default Code
[WebService(Namespace="http://tempuri.org/"))]
The Web Service based on XML required the unique namespace for the client application, which is helpful to distinguish the web service from the other services on the Web. Web Service uses the default namespace, which is tempura.org. This namespace is available for the XML Web services, which is under development. The XML Web Services, which is going to be published, should use the permanent namespace. The instance of Web Services should replace it with other URI, which is more meaningful in the production system.
We will identify the Web Service as the namespace used in the Web Service; its company will control namespace. Here we are taking an example of the company's internet domain name, which we can use as part of the namespace—the namespace of the XML Web service, which will look like the URLs. We used the URLs for pointing out the actual resources on the Web.
Points to be noted:
Here are some points which should be noted while creating web service.
- We cannot have more than one [WebService]tag.
- Changes in the namespace will not affect the namespace.
[WebServiceBinding(ConformsTo = WsiProfiles.BasicProfile1_1)]
Directly method overloading is not supported by the web service. To allow the method overloading in the Web Service, we have to add the MessageName property to differentiate the one method used in the web service from the other method, which is having the same name and used parameter.
[WebServiceBinding(ConformsTo= WsiProfiles.BasicProfile1_1)] to
[WebServiceBinding (ConformsTo = WsiProfiles.None)].
If we want to call the Web service from the Script, we will use ASP.NET, AJAX and uncomment the below line.
[System.Web.Script.Services.ScriptService]
[WebMethod]
This attribute is always used at the top of the method. We write this attribute in the Web Service. [WebMethod] attribute is used to define that the method used this attribute is exposed to the user/client access.
If we remove this attribute, in that case, the client will not be able to see the details of the method; hence they cannot implement it.
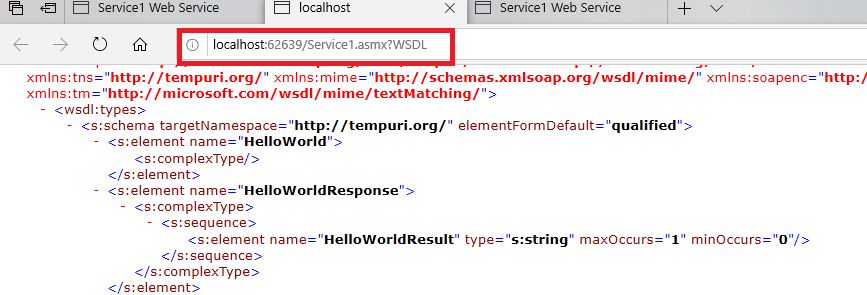
Proxy class or WSDL
WSDL (Web Service Development Language) document is used to generate the proxy class of the Web Service. WSDL document defines the Web Service. WSDL document contains the
- All the method which is exposed by the Web service.
- WSDL document contains the parameters and their types.
- WSDL document contains the return type of the methods.
Visual Studio used the information to create the proxy class. The client application will call the proxy class method. The proxy class will serialize the parameters, prepare the SOAP request message and send it to the Web Service. Web Service executes this method and returns the SOAP return message to the Proxy. The proxy class will then deserialize the SOAP response message and give it to the Client application. There is not any need to serialize or deserialize the dot net CLR objects to and from the SOAP format. The proxy class has all the responsibility of the serialization and deserialization, which makes the life of the developer easy.
Now we will see the WebService1.asmx.cs window:
1. WebService.asmx.cs page includes the System.Web.Services, and it also consists of the four other namespaces which are included by the visual Studio in the Web Application.
2. "Service1" class is inherited from the "System.Web.Services.WebServices". After inheriting the class from the "System.Web.Services.WebService" we can access the built-in ASP.Net objects such as (Application, Session, User, Context, Server ). If there is not any need for the built-in objects of .NET, then there is also do not any need of the service class from "WebService".
3. "Service1" includes the "WebService" attribute. If we want to expose any class as a service, then there is also a need to include the attribute of the "WebService".
WebService attribute contains the different properties like:
NameSpace: The use of the namespace property makes the Service uniquely identifiable. The nameSpace is the property of the XML. The client application can contain different services, so that's why there can be the chances of the collision. To avoid the collision, it is the responsibility of the provider to make the namespace unique.
Name: By using the Name property, we will provide the descriptive name to the Service.
Description: This property is used to avoid a brief description of the Service.
4. "Service1" contains another attribute as well, which is "WebServiceBinding". This is used to indicate the standard of the Service. If the Service does not follow this standard, we will get an exception.
5. With the Service, one more attribute is added, which is "[System.Web.Script.Services.ScriptService]", for making the Service accessible from the client script, Services should be decorated with this Service.
6. The "Service1" class contains a method "Hello World". This method is decorated with the "[WebMethod]" attribute. The client application accesses the service method. The Client Application should add the "Service1" method.
There can be chances that the Service is using some method for internal functionality. The client application does not have any need to use them. There is not any need to use those methods with the Web Method attribute.
WebMethod attribute contains the Name and Description property, which we can use to provide the self-describing name or description, respectively.
Mark-up
Now we will see the mark-up.
For the mark-up, we have to the right click on the Service1.asmx in the window of the Solution Explorer and select the view mark-up as shown in the below screenshot:
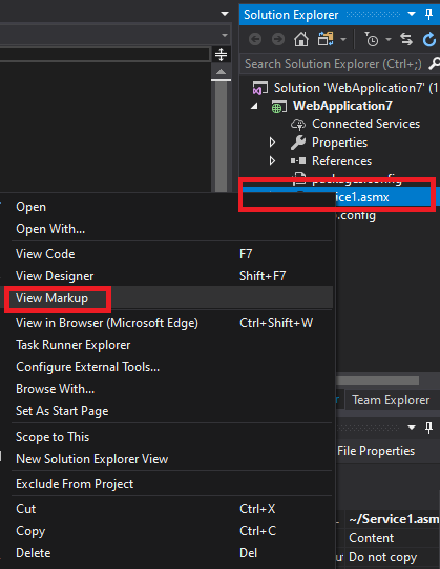
In the Service1.asmx, we will see that the Service uses the WebService directive with the attribute. From here, this will show us that the application invokes the Service, not by the end-user. Hence the asmx page has no mark-up.
Service1.asmx
Here are some points about the Service1.asmx.
- "Web Service" directive: This directive shows that the asmx page is a web service.
- "Language"="C#": This indicates that the C# language is used for the Service.
- "CodeBehind": This property has not any role with the ASP.NET or web service. CodeBehind is the property of the Visual Studio. This property is used to map the asmx page with the code behind the page.
- "Class" property contains the qualified name of the class. This is the entry point of the Service, just like the main () in C language.
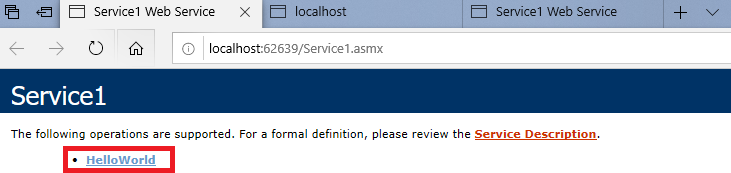
Now we will run this application after pressing the button F5. Vary). Here will find a link for the Service Description as shown in the below screenshot:
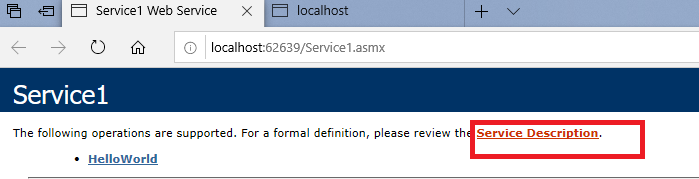
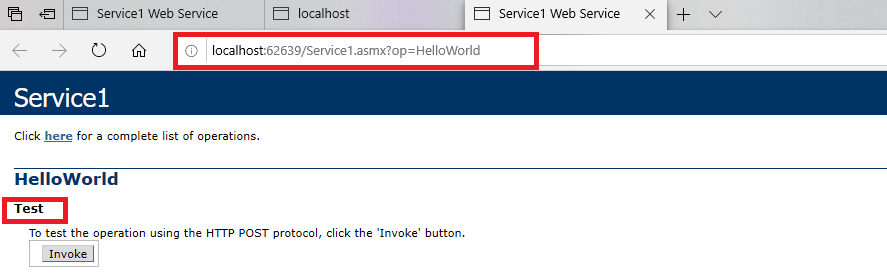
There is also another link to the HelloWorld. After clicking on this link, this will redirect us to the testing page.
After clicking on this link, this will redirect us to the Service1 Web Service page for the testing.
Implementation of web Service
Now we will implement the Service. Now we will rename the file "Service1" in the Solution Explorer to "MyService". Here we will change the class name to MyService from Service1. Now we will open the mark-up(.asmx) page.

From the above screenshot here, we will see that the visual Studio is unable to resolve the "Service1" in the class property. Here class shows the fully-qualified name of the Service, and we renamed the Service1 class to MyService, but Visual Studio is unable to resolve it.
Here we change the property of the class to "Web application.MyService" and will change the "CodeBehind" property from "Service1.asmx.cs" to "MyService.asmx.cs" like as we name the file also.
MyService.asmx
MyService.asmx.cs
After this, the Service is ready to use. Now we will compile and run this application.
After the compilation a new window will open as shown in the below screenshot:
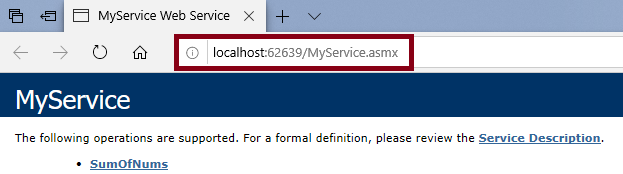
Testing of a Web Service
Now we will run the application by clicking on the F5 button. The http://localhost:62639/MyService.asmx page will open. The page will contain the link for the Service Description (the WSDL document, documentation of Web Service) and contains another link of SumOfNums. This page is the test page of the SumOfNums method as shown in the below screenshot:

Now we will use the OOP (Object Oriented Programming Concept) concept method overloading. Now we add the WebMethod in the MyService class.
MyService.asmx.cs
Now we will run this application by pressing the button F5. The http://localhost:62639/MyService.asmx page will open which contains the link for the Service Description(the WSDL document, documentation for the web service). Here we have another link SumOfNums which is the test page of the SumOfNums method as shown in the below screenshot:
After entering the values in the first text box and second text box, this will invoke the method as shown in the below screenshot:
Method Overloading
Now we will use the overloading method in the Service. Web service does not support method overloading. This will throw an error in the case of the method overloading. Here we are taking an example to show the method overloading done in the Web Service and throw an error because it does not support the overloading.
MyService.asmx.cs
OUTPUT
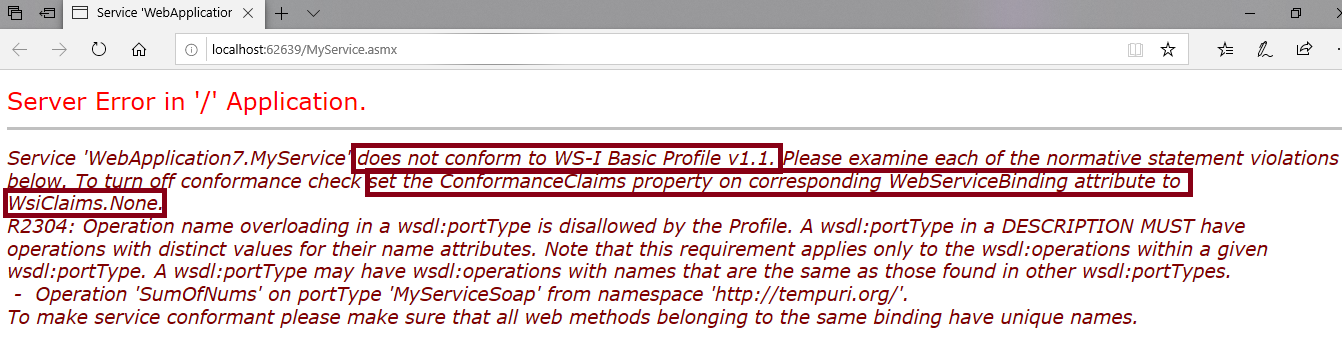
In the above example, Web Service does not support the method overloading and shows the error message that the Service "WebApplication7.MyService" does not conform to WS-I Basic Profile v1.1. Now to support the overloading method, we have to follow the following steps either we have to remove the
"[WebServiceBinding(ConformsTo = WsiProfiles.BasicProfile1_1)],"
or we have to make some changes "[WebServiceBinding(ConformsTo = WsiProfiles.None)]".
To support the overloading method, we have to make some changes in the code, as shown in the box which is highlighted:
After all these changes the Web Service will looks like as shown in the below screenshot:
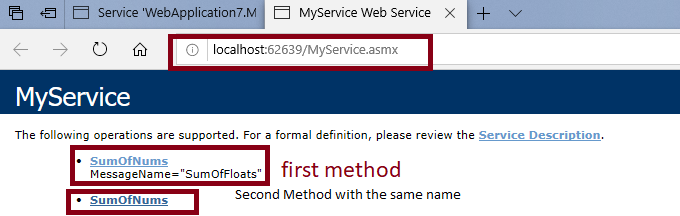
Here web service supports the method with the same name. By adding the message name property, we can create the differences between both of the methods.
By using the above property, we can use the method overloading in the Web Service.
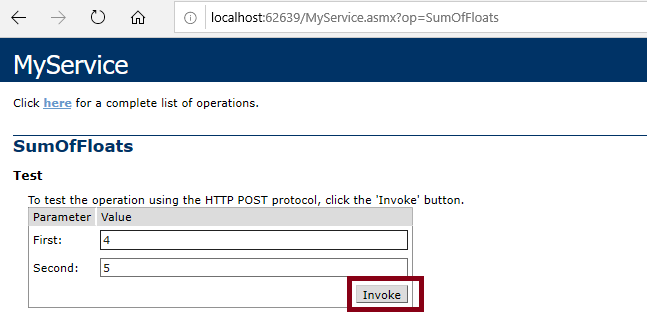
Testing of the Page
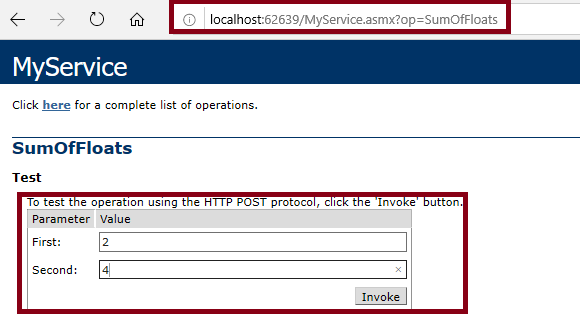
After clicking on the SumOfFloats, the page will redirect to the http://localhost:62639/MyService.asmx?op=SumOfFloats here we will see that the "?op=SumOfNums" is appended to the Service URL. This page contains the two text boxes for the two input values (First, Second), where the SumOfNums value will take as an input parameter and a "invoke" button. After clicking on this invoke button, we will redirect to the http://localhost:62639/MyService.asmx/SumOfFloats, which is having the value where the SumOfNums method returns the XML format.
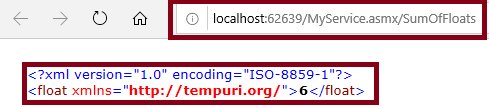
After clicking on the invoke button, we will redirect to http://localhost:62639/MyService.asmx/SumOfFloats page. This page contains the value in the XML format.

Similarly, after clicking on the "SumOfNums MessageName="SumOfFloats"". We will redirect to the "http://localhost:62639/MyService.asmx?op=SumOfFloats" . So the "SumOfNums MessageName="SumOfFloat"" method which is known as the "SumOfFloats" for client application.
Here a question is arising from where the test page came. Because we didn't add the Mark-up, but still the page was rendered.
Test Pages are not part of the Web Service. Test Page is rendered by the ASP.NET by using the Web Page c:\[WinDir]\Microsoft. NET\Framework\ [Version] \Config\DefaultWsdlHelpGenerator.aspx. "Reflection" concept renders to the test page.
WSDL Document
Web Services are self-describing, which means ASP.Net itself provides us all the information required for the client to consume a web service in the form of the WSDL document. WSDL document tells the client about the methods which are present in the Web Service. And the what parameter and return value used by the method and how a client application can communicate with them. WSDL is an XML standard.
Hosting of the Web Service
For the hosting of the web service, we will add the reference to the Service and consume it from the different applications. Here we suppose that the port number can vary, so now we will host the Service on the IIS (Internet Information Server) for getting the particular address of the server. For this, we will open the Internet Information Server-> Go to the default web site-> Right-click on the application-> Add the Application->browse to the physical location of our Service for the physical path field-> Click "OK". Now we will browse the application with the alias name http://localhost/WebServiceDemo/ for the testing if the application was correctly hosted. Here we will get an error "HTTP Error 403.14-Forbidden". This error was coming because there is not set any default document for this application. Now we will add a page as a default document "MyService.asmx". Now we can browse our application by adding this URL in the browser localhost/WebServiceDemo/MyService.asmx.


No comments:
Post a Comment